A language switcher gives your site visitors the possibility to switch between the languages you provide on your multilingual site and thus to read the content in their preferred language. With MultilingualPress you can set up a language switcher either via a navigation menu or via a menu widget.
Here you can find a step-by-step guide for setting up the language switcher.
Table of Contents
Set up a language switcher in your navigation menu
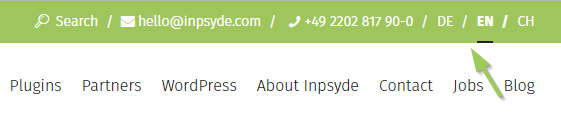
Follow these steps if you want to show a language switcher in your navigation menu as you can see it in the screenshot below.
- Go to Appearance→ Menus.
- Click on the link Create a new menu and enter a name. Afterwards click the button Create Menu.
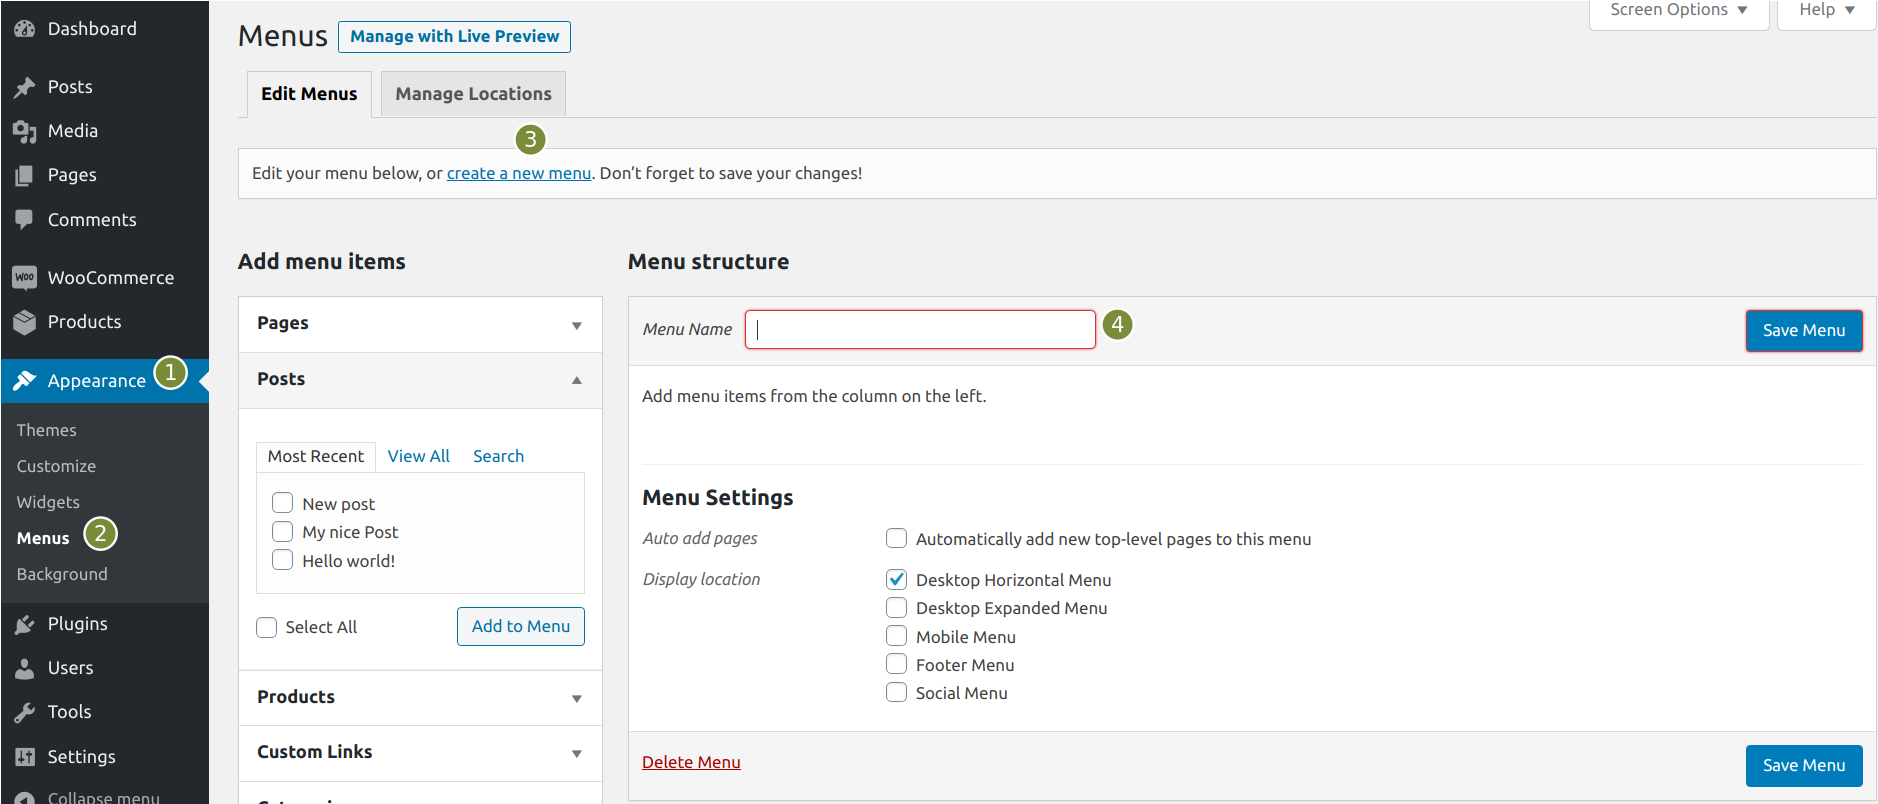
Create a new menu and enter a name for the menu, e.g. Main Menu - After that, in the left sidebar open the Languages dropdown. If this dropdown is not visible yet, you first need to activate it: open the Screen Options menu and select the Languages checkbox.
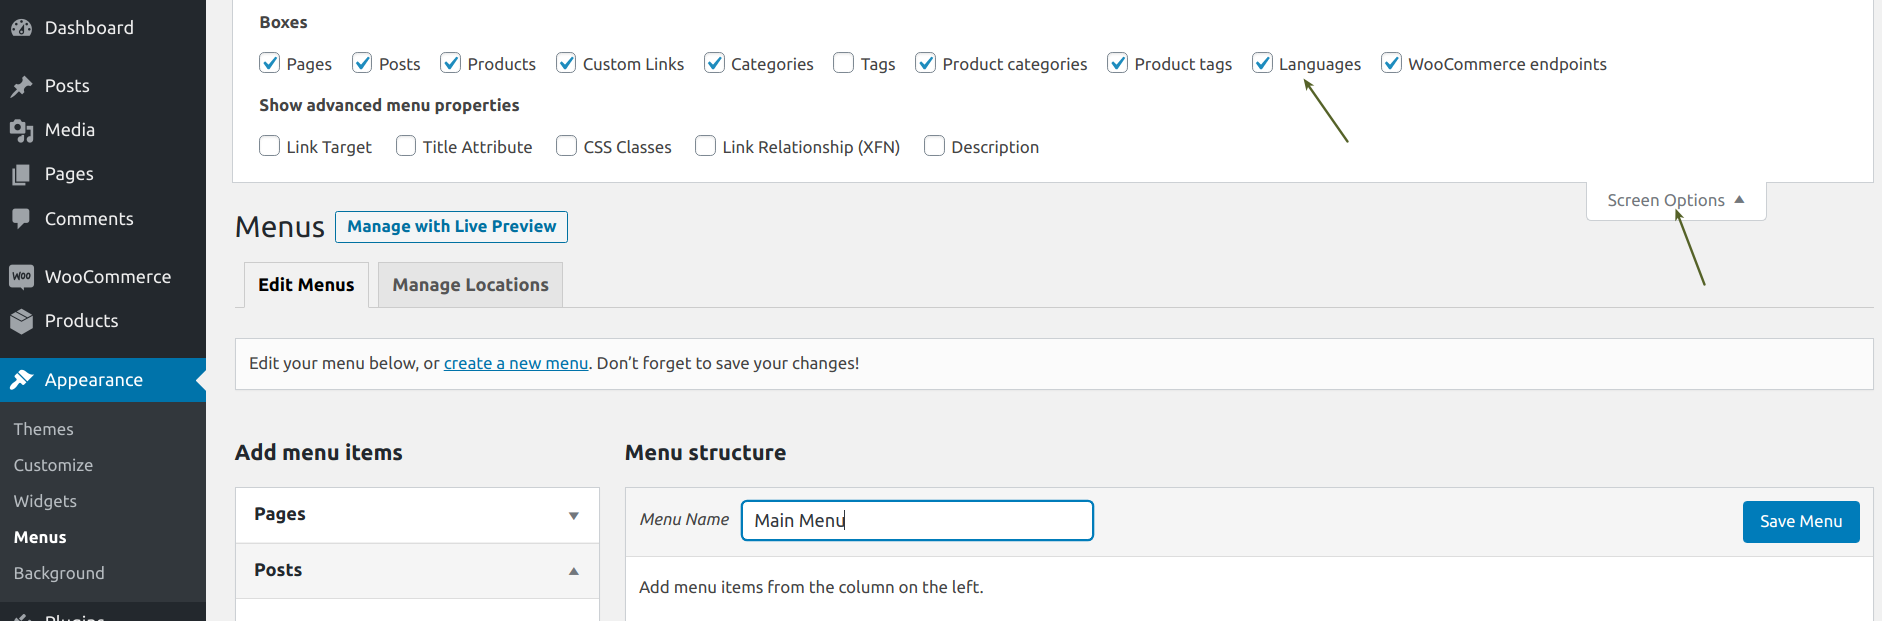
You can use Screen Options to display the languages box in the sidebar. - If you have opened the Languages box on the left, then you will see all language versions of your website (e.g. German and English). Now check the languages that you want to be shown in the language menu. Then click Add to menu.

Use the Languages toggle to add the languages that should appear in the menu. - Now the selected languages are shown in the language switcher menu. You can change the order of the languages using drag & drop or if you click on Move while the languages box is open. You can also change the name of the language as it appears on your website in the Navigation Label field.

Make individual changes in the language menu. Finally, the following advanced settings are also available:
- You can optionally specify an HTML attribute title.
- By ticking Open link in a new tab, you can indicate that the language will open in a new tab.
- You can also optionally customize the CSS classes and link relationships (XFN).
- In the description you can write a short info about the language. However, this is only displayed if the theme you are using supports displaying.
If you do not see these options, is because you have to open the upper menu Screen Options again and check the Show advanced menu properties checkboxes.
- Then click Save Menu.
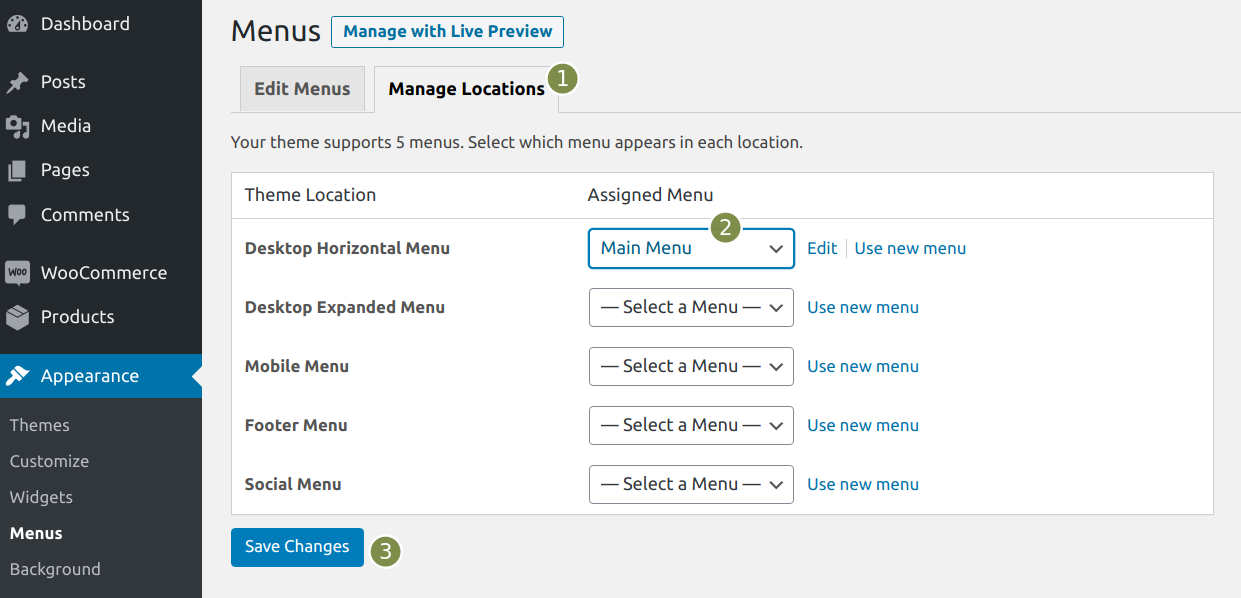
- In order to let your visitors see the language menu, you have to assign a position to the menu in the theme. To do this, switch to the Manage Locations tab. Select your language menu in one of the available locations and then click Save Changes.
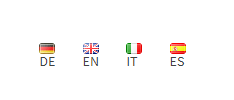
Determine the position of your Language menu. - Starting from MultilingualPress version 3.9.0 is possible to automatically render a language flag next to each element of the menu. To achieve that, simply activate the MultilingualPress Site Flags option in the MultilingualPress Global Settings panel. More details are available here: Global settings for MultilingualPress.
Set up language switcher via the Navigation Menu widget
If you want your language switcher to appear in the sidebar of your website, make the following settings.
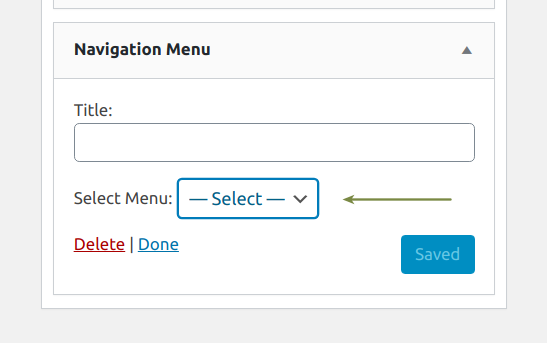
- Go to Appearance → Widgets.
- There you will see various widgets available. Select the Navigation Menu widget. Drag and drop it into your sidebar.
- Select the menu in which you created the language links (see Setting up the language switcher using the navigation menu, steps 1 to 6).
Set up a language switcher via the Language Switcher widget
If you need to create a language switcher without manually setting a menu like shown in the first section of this tutorial, you can use the Language Switcher widget. In fact, this widget automatically renders a language switcher in the location where it is set.
- Go to Appearance → Widgets.
- Select the Language Switcher widget. Drag and drop it into your desired location.
- Configure the settings s shown in the picture below.
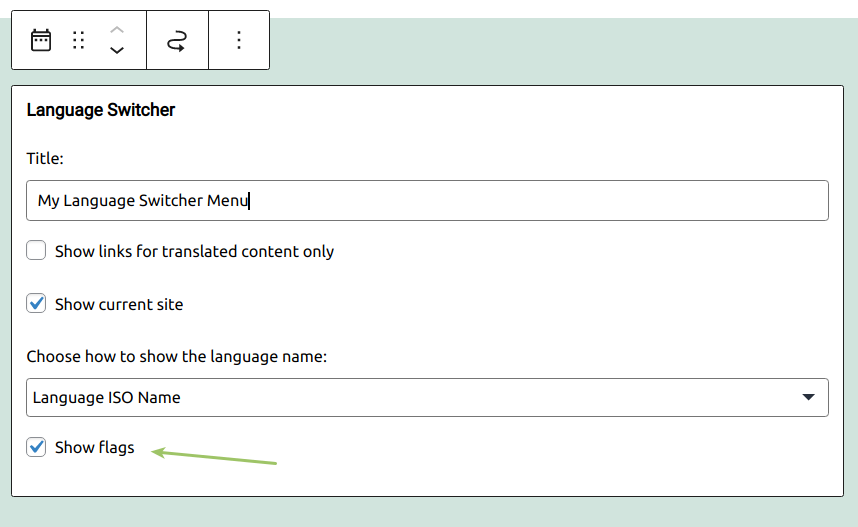
Language Switcher settings If the MultilingualPress Site Flags option in the MultilingualPress Global Settings panel is enabled, the option to render the language flags (Show flags) is also available. More details about the module activation are available here: Global settings for MultilingualPress.
Show language flags via an additional plugin
For versions minor than 3.9.0 the MultilingualPress Site Flags option in the MultilingualPress Global Settings panel is not available. In that case, we have developed a small plug-in for MultilingualPress, which enables you to display flags in the language switcher. All you have to do is install the plugin and activate it across the network. You can get the additional plugin from us requesting it in our Support.