Starting from version 3.5 MultilingualPress offers a new module that lets you easily manage the custom fields translation through the Plugin Advanced Custom Fields (ACF). To show how this feature works in your Multilingual site, here we provide a brief tutorial on the topic.
Note: For custom fields created by using other Plugins or the WordPress API for custom fields, we recommend this tutorial.
Table of Contents
Environment settings: WordPress Multisite and MultilingualPress
First of all, create a Multisite WordPress installation and then install MultilingualPress version 3.5 or above. In case you need support to install a multisite environment, you can follow the instruction here reported: how-to-install-wordpress-multisite
When your Network is ready you can then proceed in installing and network activating MultilingualPress. Also in this case, if you need support you can refer to the following document: Installing-MultilingualPress
You are just a step far for creating your Multilingual site: proceed in creating two or more subsites as explained in Create-a-new-website-within-the-multisite-and-set-the-language-for-the-site, and connect them in MultilingualPress through the Relationships section.
If now we go to MySites→Network Admin→MultilingualPress we see that the ACF Module is disabled.

This because we haven’t installed yet the ACF Plugin in the Network. To accomplish that let’s proceed to the next section.
ACF installation and activation
In this section, we can now proceed in installing the Advanced Custom Fields Plugin. To do so you can log into your WordPress installation back end and then go to My Sites→Network Admin→Plugins.
From there, search for Advanced Custom Fields By Elliot Condon Plugin, then install and activate the Plugin by clicking on the button.
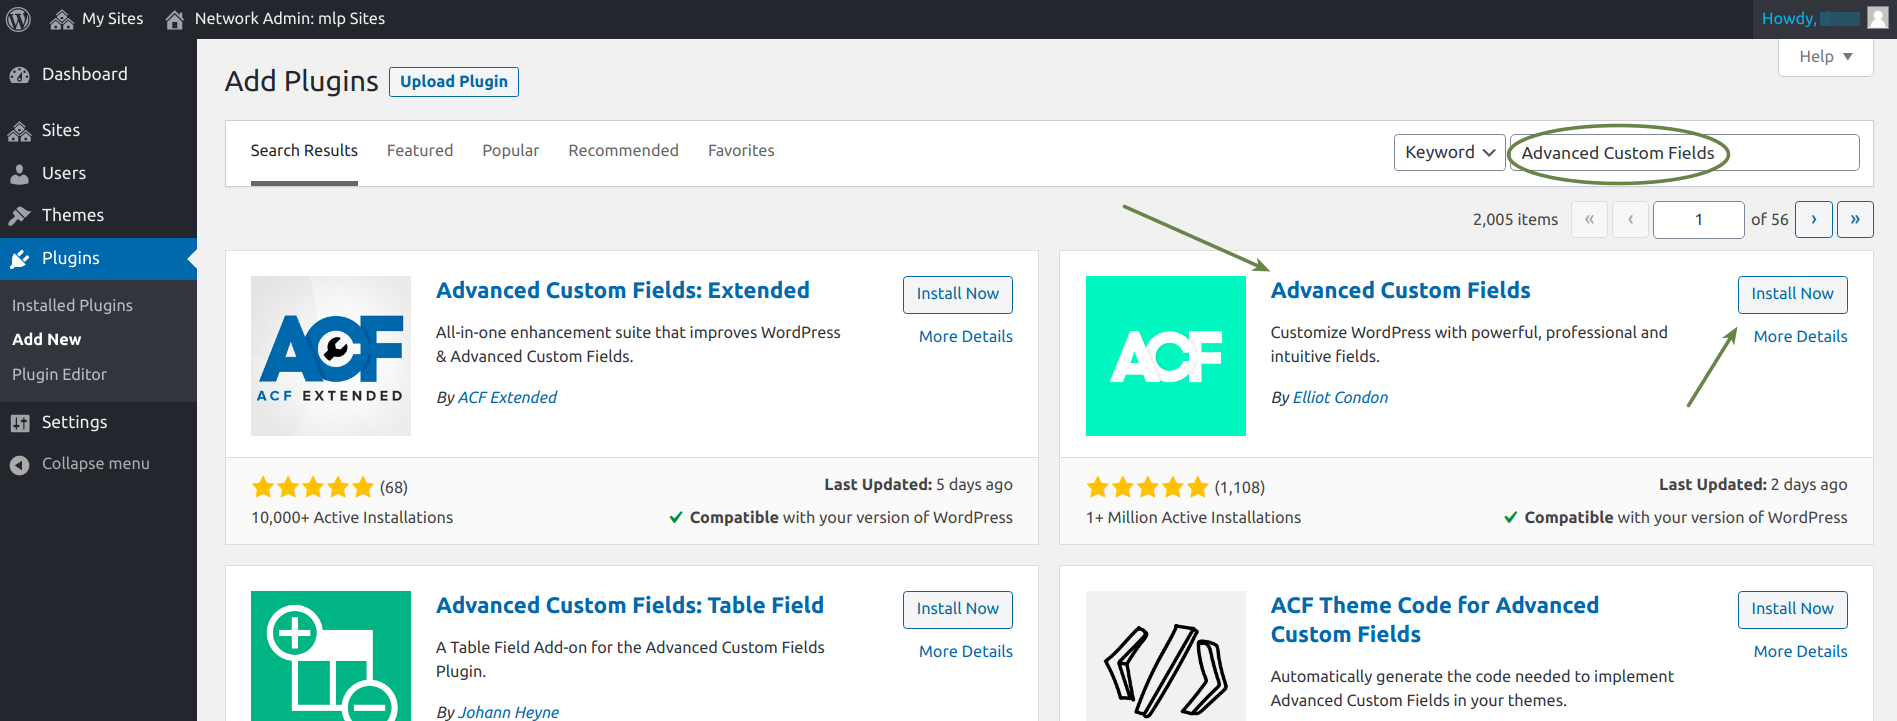
This way you activated the ACF Plugin on your site.
ACF Module Activation
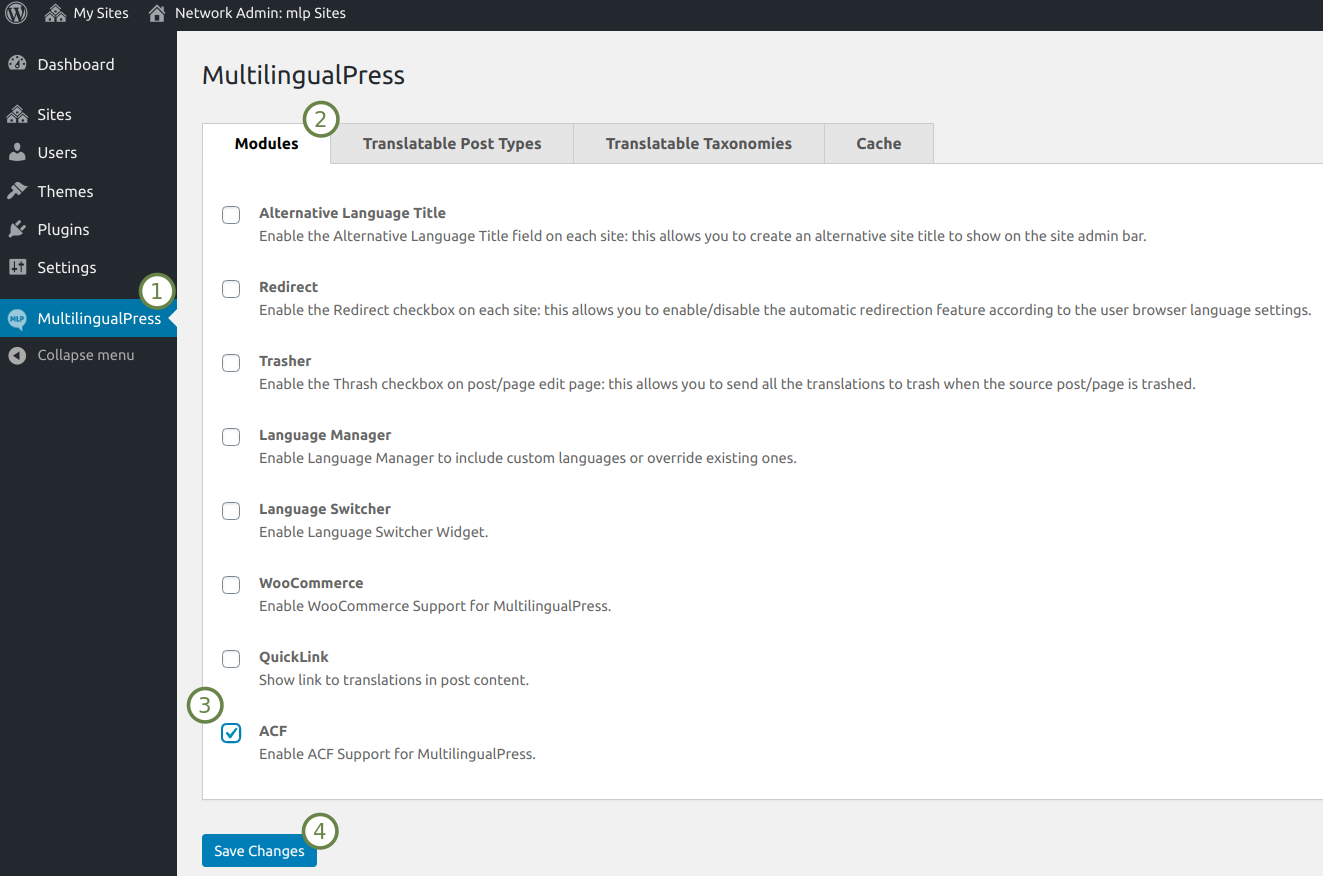
The next step is to activate the ACF module in MultilingualPress. This can be easily accomplished by going into MySites→Network Admin and selecting the MultilingualPress link in the left menu.
This way you access the MultilingualPress settings page. From there, in the Modules tab, click on the ACF checkbox and finally press the Save Changes button to activate the ACF module.
ACF Settings
In this section, we provide an example of how the custom fields should be set.
Suppose we want to add a proverb every time we create a post. To achieve that let’s create a group of new custom fields to be added to the standard posts called Proverbs Group.
Go to your main subsite Dashboard and then head to Custom Fields→Add New. Fill in the group text field the name Proverbs Group as shown below.
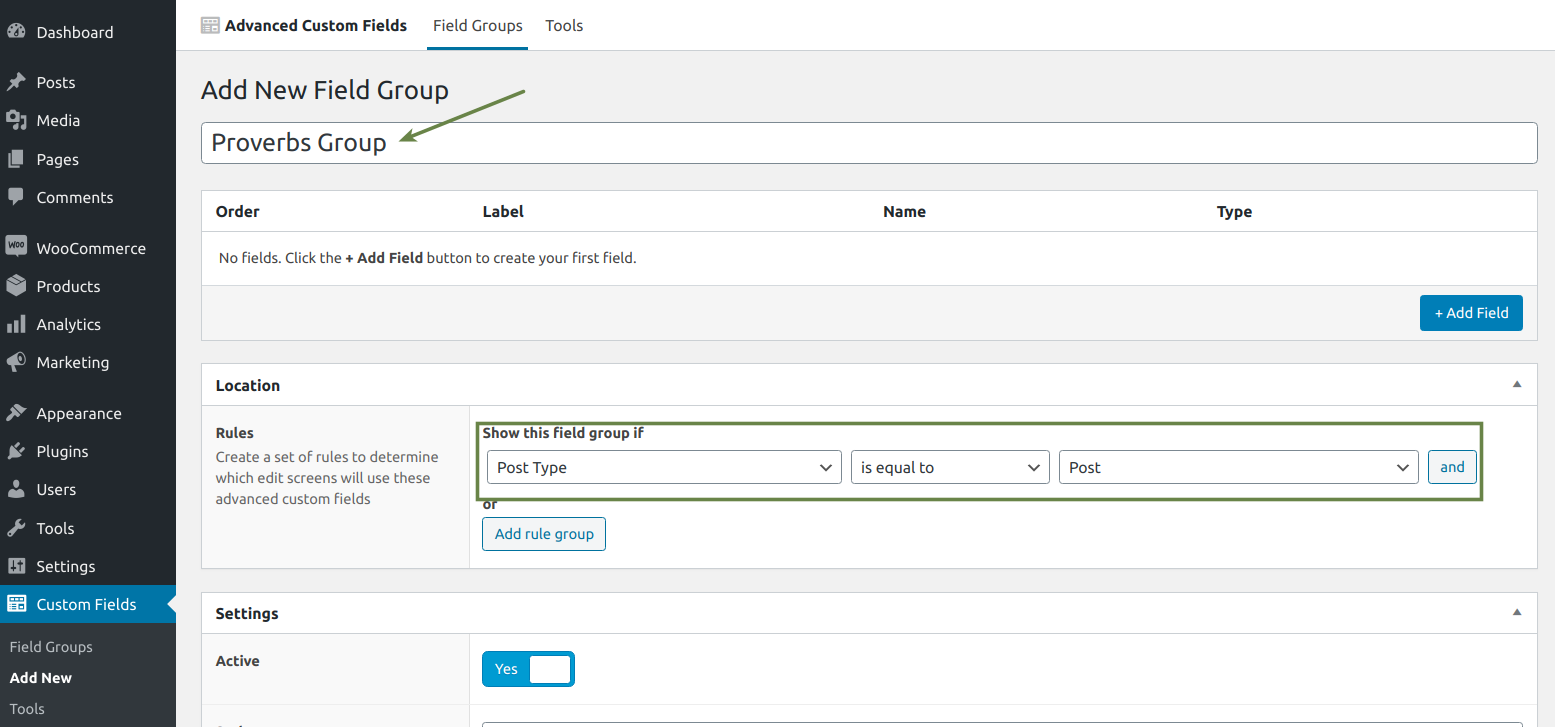
In the Location section, it is possible to specify to which post type the new fields will be added.
Right under the Field Group name, it is possible to add one or more custom fields pressing the Add Field button . Let’s create a text area field with label Proverb as shown below.
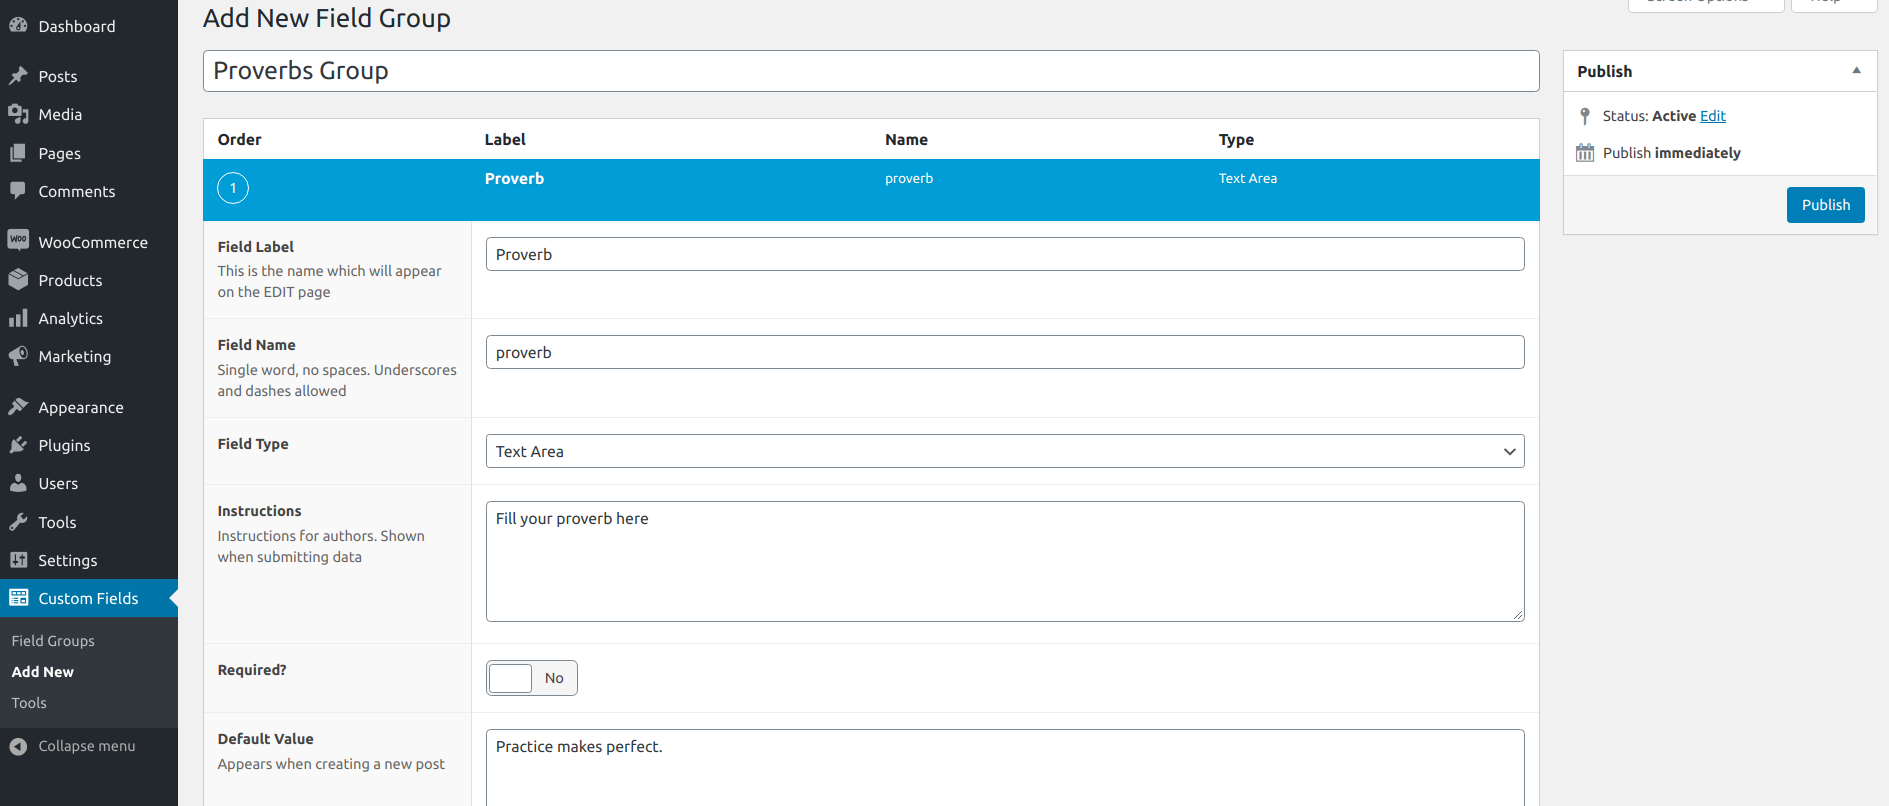
The ACF Plugin lets you configure several types of fields, for further details you can refer to the official documentation
At this point the fields are ready in our main subsite, but now we also need to create the same custom fields in all the subsites where we want manage their translation through MultilingualPress.
To proceed, go to the main subsite Dashboard and there head to Custom Fields→Tools . In that section, it is possible to export the custom fields we want to replicate in other subsites.
Select the Proverbs Group checkbox in the Export Field Group meta-box, then press Export File to create the file with the data to export.
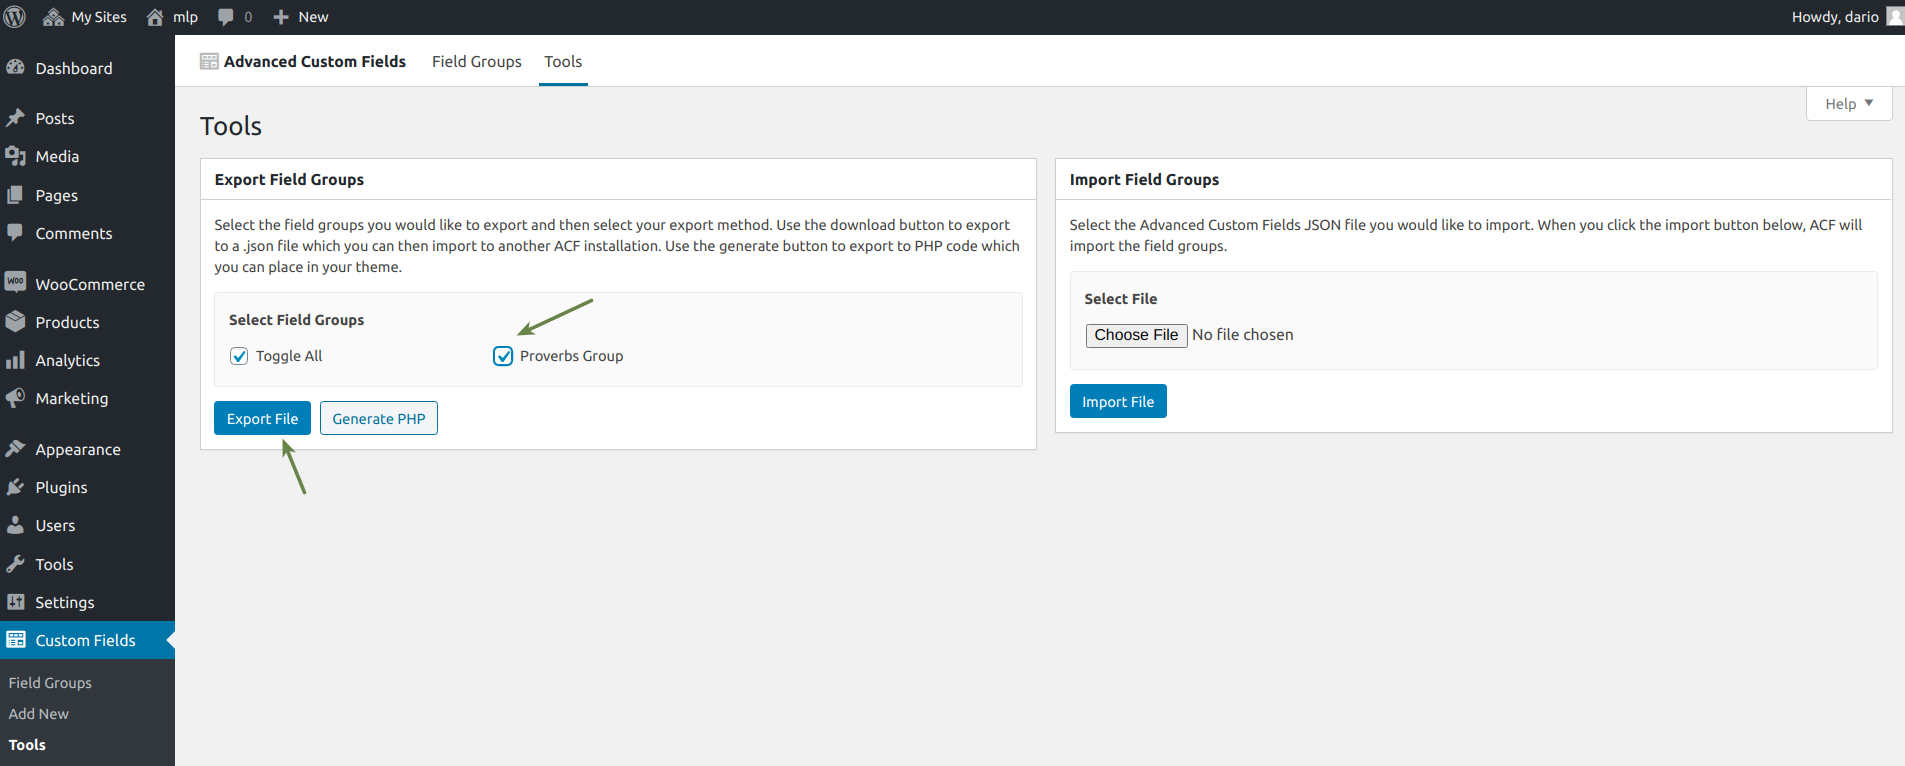
Similarly, from the Dashboard of a secondary sub-site related with the main one, the site it in our example, import the previously exported file: head to Custom Fields→Tools and in the Import Field Group section upload the file and then press Import File .

At this point, we have the same custom fields in two subsites connected through MultilingualPress.
Finally let’s check how MultilingualPress manages such fields.
ACF Translation
At this point we are ready to work with the custom field through MultilingualPress.
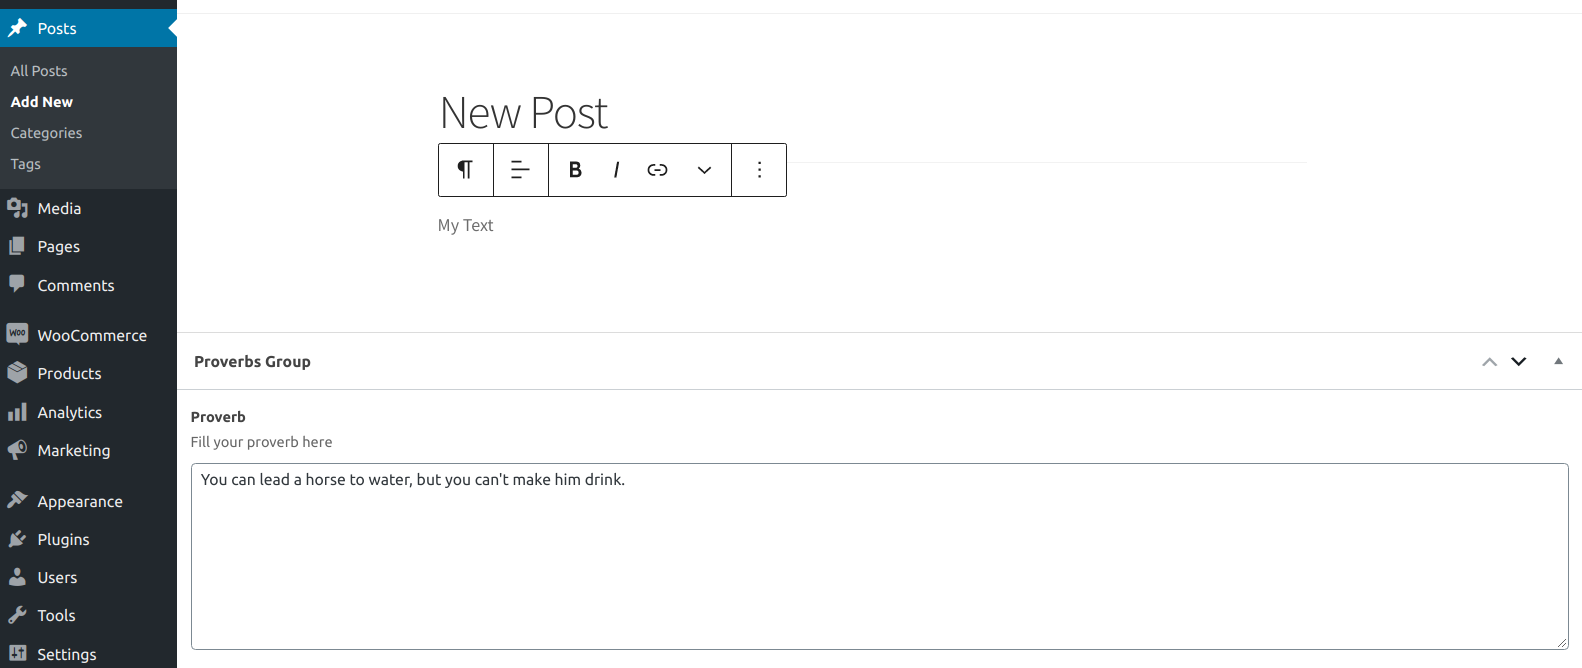
To do so, let’s create a new post in the main subsite and let’s fill the Proverb field with the sentence “You can lead a horse to water, but you can’t make him drink.“, as shown in the picture below.
Then in the translation meta-box that relates the content with the connected subsite, it in our example, we select the radio button option in order to create a copy of our post.

After this selection, the other tabs are enabled: we can access the ACF tab and set the checkbox in order to overwrite the remote custom field content with the proverb sentence we previously inserted.

After that we can save our post and go to the second subsite, it in our case. There we will find the new post created via MultilingualPress with the same custom field filled with the expected proverb content.
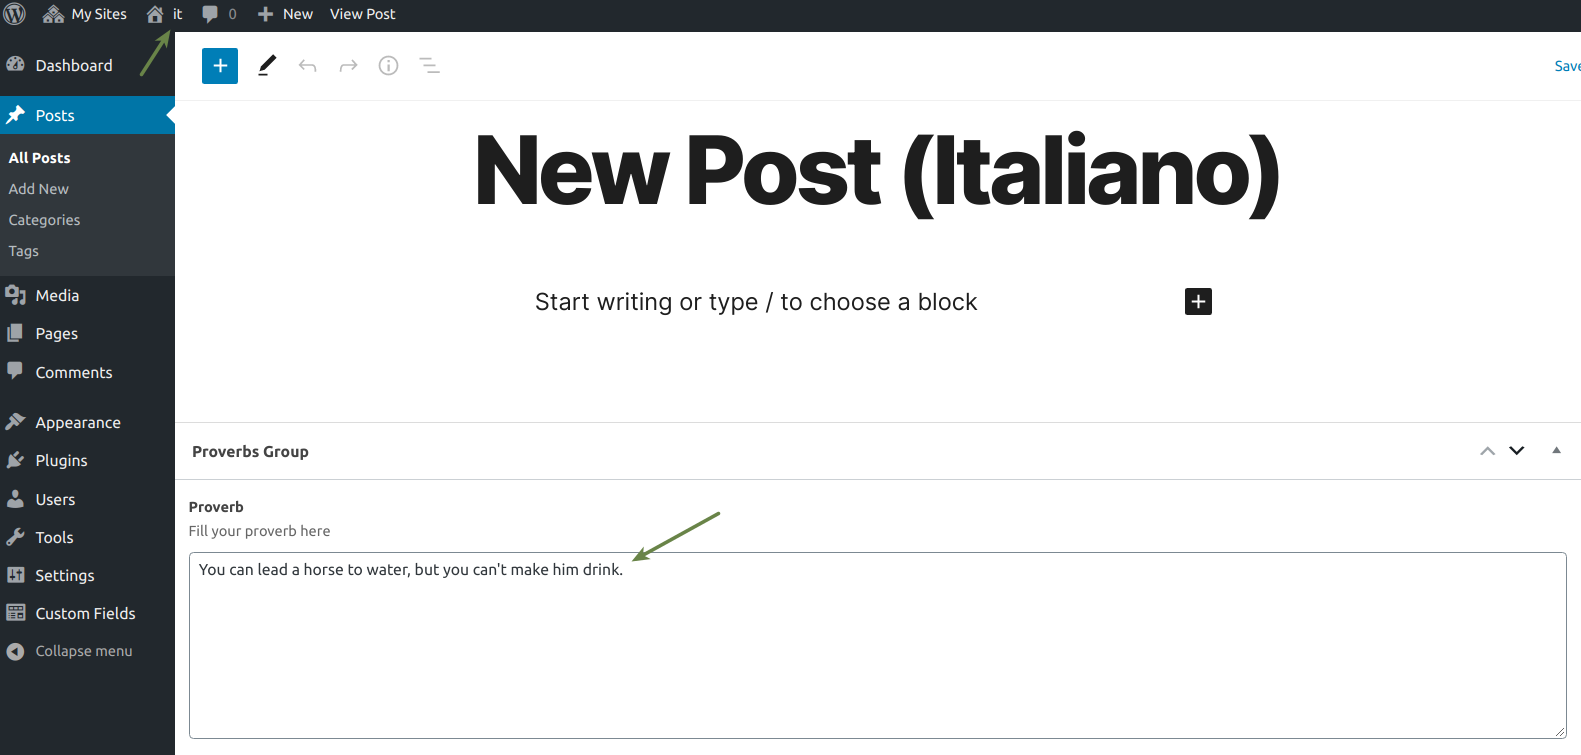
Similarly, you will be able to propagate any custom field content to all the related subsites. Just working only on a single post, all the related ones will be then properly managed by MultilingualPress.
