In this tutorial we explain how you can install and set up a WordPress Multisite to build a network of websites. We assume that you already installed a WordPress Single Site. Moreover we assume you have FTP access to the directory of your WordPress installation, as you need to change some files.
Table of Contents
Install WordPress Multisite – the Requirements
Before you start to install the WordPress multisite, please make sure that:
- You already have a WordPress installation
- Pretty Permalinks are activated. This means your URLs should not look like this http://example.com/?p=2345, but rather like this http://example.com/my-page
- All plugins are deactivated
- Important: you have a backup of your WordPress installation
- You have FTP access to your WordPress installation
Allow Multisite in wp-config.php
The first step is to activate the Multisite feature in the file wp-config.php.
- Set up a FTP connection to your website.
- Open the file wp-config.php, which is is located in the main directory of your WordPress, and add the line
define('WP_ALLOW_MULTISITE', true);
above the line:
/* That's all, stop editing! Happy blogging. */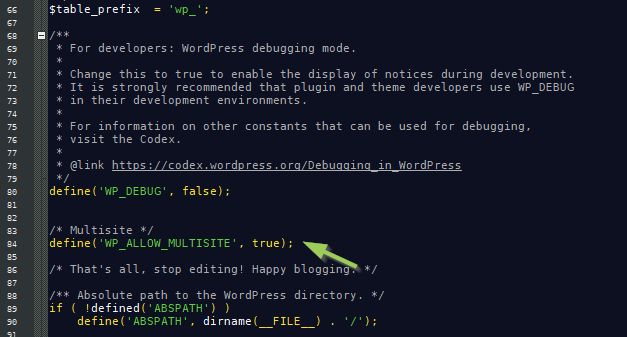
Define WP_ALLOW_MULTISITE in wp-config.php to enable the Multisite feature. - Save the file wp-config.php.
Now you enabled the Multisite feature in your WordPress installation. But you haven’t finished yet. The next step is to install the network.
Install the WordPress Network
- Refresh the page in your browser and log in to your website.
- In the left sidebar under Tools you will find the menu tab Network Setup, where you can configure your WordPress Multisite.
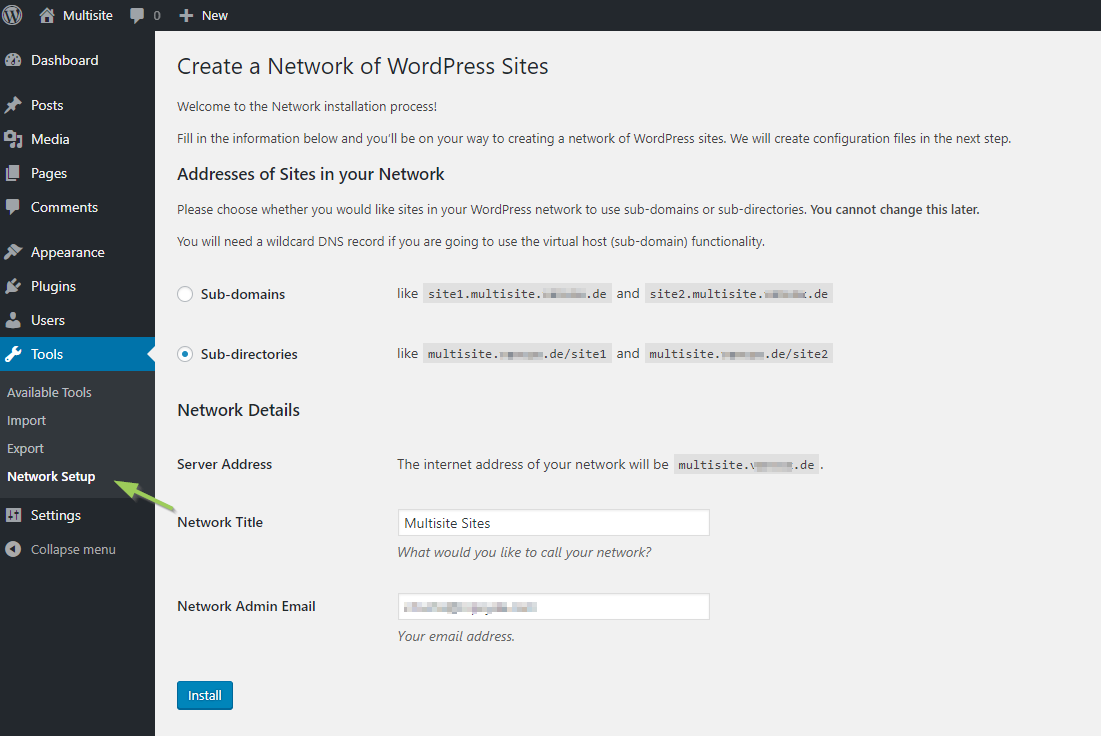
Install a WordPress Multisite – Settings page “Create a Network of WordPress Sites” - Decide whether you want to use subdomains for the sites in your network (e.g. site1.example.com) or whether you want to have them installed in subfolders (e.g. example.com/site1). This setting affects all the sites in your network, you cannot change that later on. Do you need a site to be mapped to a top level domain (e.g. mydomain.com)? This is possible with domain mapping.
-
Enter a name for your network in the field Network Title in the section Network Details.
-
Enter the site admin’s e-mail address.
- Click the Install button.
Add some code to wp-config.php and .htaccess
WordPress will now provide you with two snippets of code, which you need to add to the wp-config.php and .htaccess files. Both files are located in the root directory of your WordPress.
- Set up a FTP connection to your website.
- Add the first code snippet to your wp-config.php directly above the line
/* That's all, stop editing! Happy blogging. */
The snippet looks like this, but adapted to your own site:define('MULTISITE', true); define('SUBDOMAIN_INSTALL', true); define('DOMAIN_CURRENT_SITE', 'My Website'); define('PATH_CURRENT_SITE', '/'); define('SITE_ID_CURRENT_SITE', 1); define('BLOG_ID_CURRENT_SITE', 1); - Add the second code snippet to the .htaccess file and replace other WordPress rules.
RewriteEngine On RewriteBase / RewriteRule ^index\.php$ - [L] # add a trailing slash to /wp-admin RewriteRule ^([_0-9a-zA-Z-]+/)?wp-admin$ $1wp-admin/ [R=301,L] RewriteCond %{REQUEST_FILENAME} -f [OR] RewriteCond %{REQUEST_FILENAME} -d RewriteRule ^ - [L] RewriteRule ^([_0-9a-zA-Z-]+/)?(wp-(content|admin|includes).*) $2 [L] RewriteRule ^([_0-9a-zA-Z-]+/)?(.*\.php)$ $2 [L] RewriteRule . index.php [L] - Save both files.
Menu network administration and the network settings
When you changed the wp-config.php and the .htaccess, log into your WordPress admin area again. In the upper admin bar, you now see the new menu Network Admin. It’s displayed always, so you can always enter the admin area of the network, no matter on which site of your network you are. We take a look at the sub menues later on.
Below the network administration, all sites of the network are listed to which you were added. By clicking on the names, you enter the backends of these sites.

And here’s the explanation of the menu tabs in the network administration:
- Dashboard: Here you can find the widget to add new users and new sites to your network.
- Sites: On this tab, you can see all sites of your network – similar to the posts and pages. By moving the cursor over the websites, you see for example links to edit, display the dashboard, view, delete, archive or deactivate the sites. Note that you have fewer functions for the main page of your network, as this one always needs to exist and you cannot delete it.
- Users: Here you can administer the users of your network. In contrast to a single site installation, you can assign the super admin user role. The super admin has access to all sites and can make changes within the whole network. If you want a user to have access to the sites of your network, you need to add the user to each site via the user administration of the sites.
- Themes: The theme administration. Here you can install and uninstall themes and activate or deactivate them for the whole network.
- Plugins: Here you can find all installed plugins. You can add new plugins or delete them, you can activate or deactivate them for the whole network.
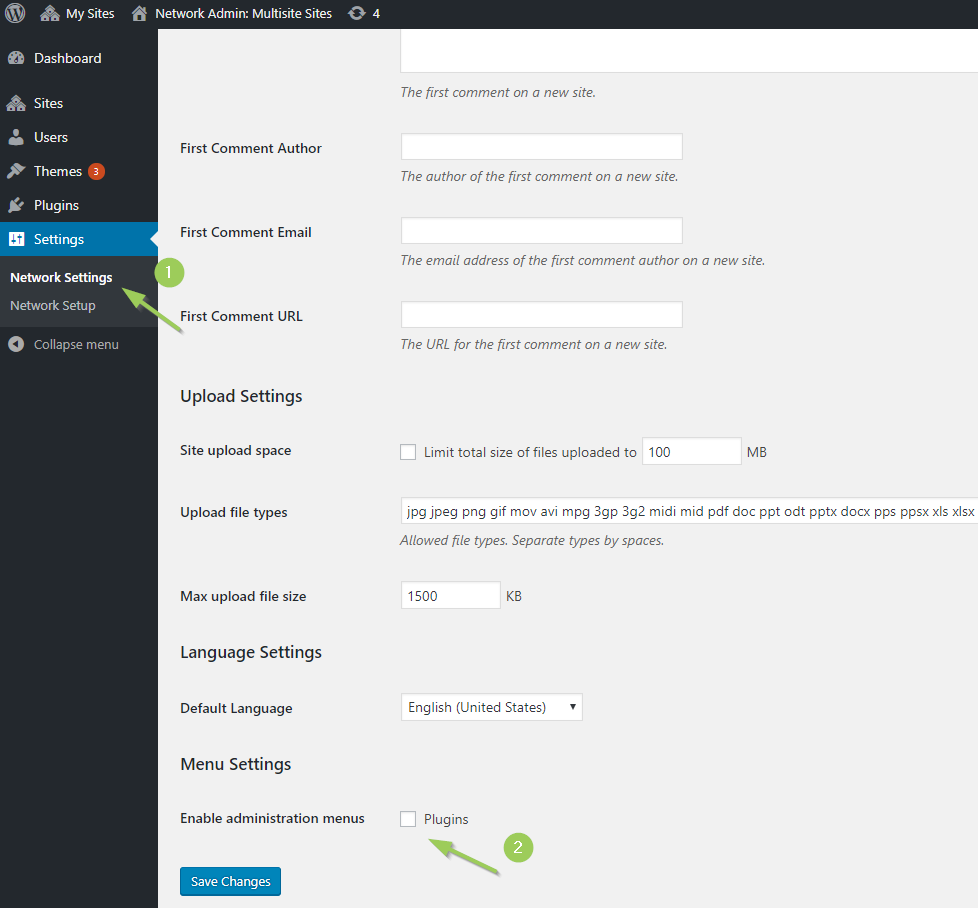
- Settings: On this tab you can find and edit the basic settings for your site, for example: the network name and the admin E-Mail address, you can allow user registrations, add new users to the site admins, you can make the themes and plugins menu available for site admins or set the standard language of your sites.
Add a new website to the network
A WordPress multisite with only one website doesn’t really make sense. To a WordPress multisite, you can add as many websites as you want – always and any time, so, it needn’t be at the beginning. To enhance your website with a new site, take the following steps:
- Go to My Sites → Network Admin → Sites and click Add new.
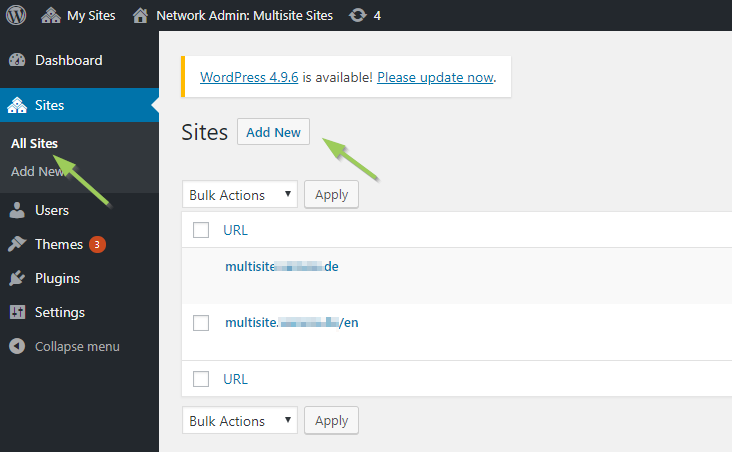
Add a new website to a multisite - Enter the desired website address. In this case, we decided for a network with sub directories. The domain is already given, we just add the sub diretory.

Settings for the new website in the multisite network - Define a title of the website. This one is displayed at several positions in your network, for example in the backend as website name in My Sites, but maybe also in the frontend or in meta data like the page title.
- Choose a language for the new website.
- Choose the admin e-mail address which must be different than the one for the whole network. If there is no user with this e-mail yet, a new user with admin role for this site will be created.
- Click the button Add Site. Your new site is to be created and will be displayed in My Sites → Network Admin → Sites. However, in order to let others than the current admin administer this new site, you need to add them as user with admin role to this site.
Install Plugins and Themes in the WordPress multisite
Install or uninstall plugins or themes in a WordPress multisite network is something only the super admin can do. The site admins within the network can only activate or deactivate them. Well, and site admins can only activate and deactivate plugins in case the super admin checked the box Enable administration menus in the network administration in Settings → Network Settings.
You can find the plugins administration for the whole network under Network Admin → Plugins, the themes administration under Network Admin → Themes.
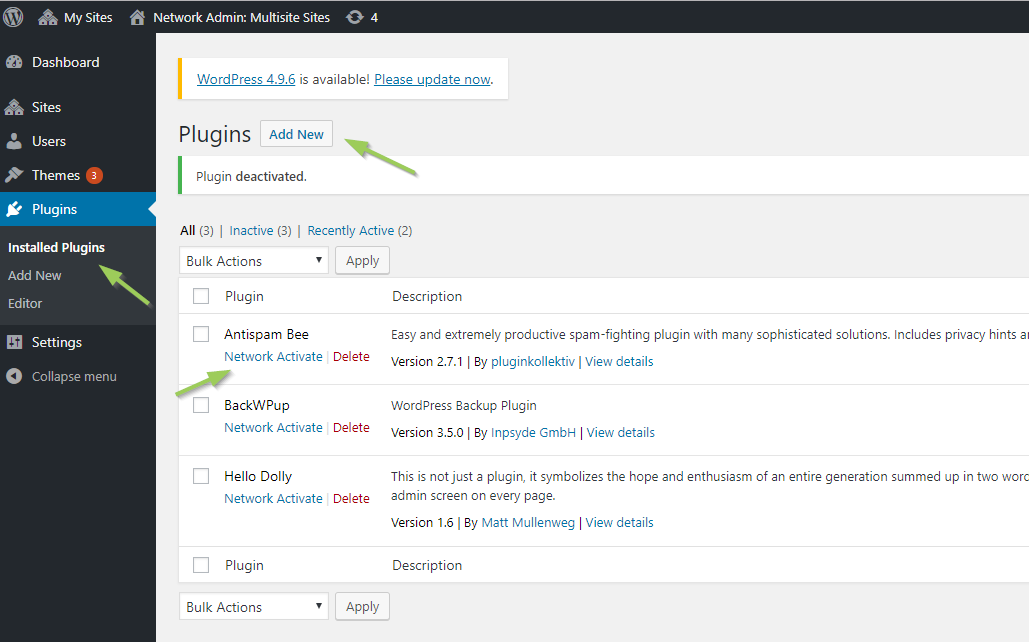
For the site admin, the whole thing looks like the next picture.

Hint: The admin can activate and deactivate plugins, but he cannot install or uninstall them.
For one of the plugins in our example you can read Network Only. This means the plugin is available only for all sites or for no site. Moreover, it’s the super admin only who can set the settings of this specific plugin, you need to make them in the network administration.
You can find further help to set up your multisite in our documentation category WordPress Multisite 1×1. In case you are setting up a multilingual website, take a look at: MultilingualPress getting started.